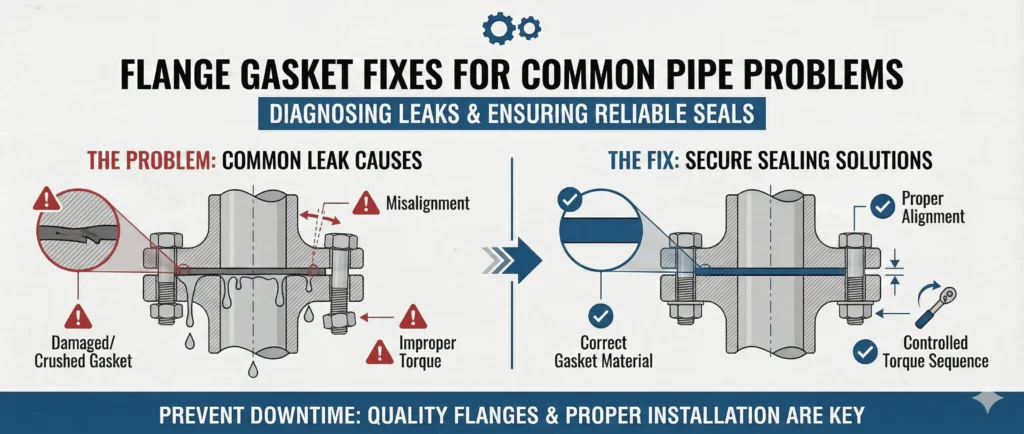
Most flange gasket leaks come from one of five problems: wrong gasket material, damaged flange faces, uneven bolt load, gasket reuse, or vibration and thermal cycling that reduce sealing stress over time. If you identify the real cause first, you can usually stop the leak without repeating the same repair again. For a broader view of repeat joint failures, see our guide to common causes of flange leakage.
A flange gasket is only as effective as the joint it sits in. The gasket must match the fluid, temperature, pressure, and flange facing style, while the flanges themselves must be aligned, clean, and tightened correctly. Quality flanges, such as Sunhy’s stainless steel flanges, help the gasket seat evenly and maintain compression, but even a good flange cannot compensate for the wrong gasket type or poor installation practice.
This guide focuses on what users actually need when a joint is leaking: what caused the flange gasket leak, how to fix it correctly, how to choose the right replacement gasket, and when the gasket or the whole joint should be rebuilt instead of simply retightened.
| Pipe Problem | How the Gasket Is Involved |
|---|---|
| Leaks | Seal stress is lost, or the gasket no longer fills flange-face imperfections correctly. |
| Pressure Loss | Improper seating or blowout paths allow process fluid or gas to escape. |
| Corrosion | Escaping media can attack flange faces, bolts, and surrounding pipe supports. |
| Vibration | Movement can reduce bolt tension and gradually break gasket compression. |
| Noise | Leak jets and vibration often create noise before visible leakage becomes severe. |
Proper gasket selection, joint preparation, and controlled tightening reduce repeat failures, extend service life, and lower maintenance cost.
What causes a flange gasket leak?
A flange gasket leak happens when the joint loses the compression needed to keep the sealing surface closed.
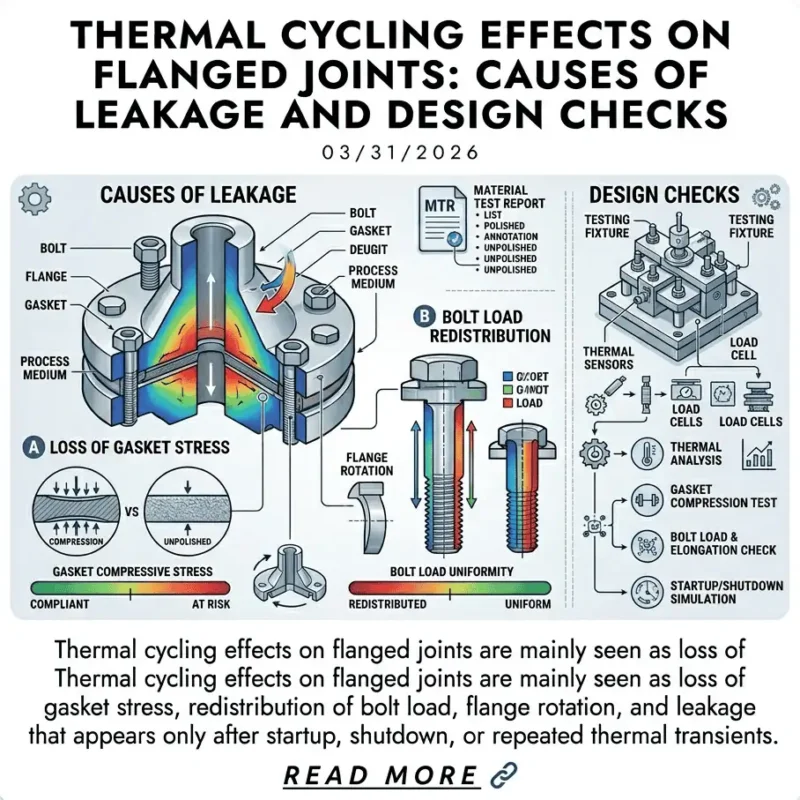
This may happen because the gasket material is wrong for the service, the flange faces are scratched or corroded, the bolts were tightened unevenly, or vibration and thermal cycling relaxed the joint after startup. In many cases, the gasket itself is blamed too quickly when the real cause is poor alignment, damaged flange surfaces, or incorrect bolting procedure.
In field maintenance, technicians usually find one or more of these root causes behind a leaking flange joint:
- Under-compression, over-compression, or uneven compression of the gasket
- Re-use of old gaskets after the joint has already been broken
- Chemical attack that softens, swells, cracks, or embrittles the gasket material
- Wrong gasket size, facing style, or material for the service conditions
- Excessive vibration or thermal shock that reduces bolt tension
- Dirty, warped, corroded, or damaged flange faces
A practical maintenance rule is simple: if the same flange joint keeps leaking after retightening, stop treating it as a torque problem and start treating it as a root-cause problem.
How a flange gasket seals
How Gaskets Seal
A flange gasket seals by compressing between the flange faces and filling the microscopic irregularities that would otherwise create a leak path.
When the bolts are tightened, the load is transferred through the flange faces into the gasket. The gasket deforms enough to close the surface gaps, but it must also retain enough resilience to survive pressure, temperature change, vibration, and relaxation after startup.
The quality of the seal depends on three things working together:
- The gasket material and its compressibility
- The flange face condition and flange face roughness and gasket seating
- The bolt load pattern and how evenly that load is applied
High-quality flanges with a consistent facing finish help the gasket grip better and seat more evenly. That is why flange condition matters just as much as gasket material when diagnosing repeat leakage.
Tip: Always match the gasket type and material to both the service conditions and the flange facing style. A good gasket in the wrong joint still leaks.
Common flange gasket leak fixes
Types of Flange Gaskets and Where They Work Best
Different gasket types solve different leak risks.
The best replacement gasket depends on the pressure level, flange type, temperature, chemical exposure, and how much recovery the joint needs after cycling.
| Gasket Type | Strength | Temperature Resistance | Leak Prevention | Best Use Case |
|---|---|---|---|---|
| Spiral Wound | High | Up to 1,100°F | Excellent | High-pressure flanges, chemical lines, general critical service |
| Sheet / Flat | Moderate | Up to 800°F | Good | Smooth-surface flanges, lower-pressure service |
| Ring Type Joint | High | Up to 1,200°F | Excellent | Oil and gas, very high-pressure systems |
Spiral wound gaskets are widely used when the joint needs strength, recovery, and tolerance to pressure cycling. Sheet gaskets are more common in lower-pressure service or on smoother flange faces. RTJ gaskets are used where the flange and pressure class are designed specifically for that sealing style.
Material Choices
Selecting the right gasket material is one of the most important leak-prevention decisions in piping.
The material must resist the fluid, temperature, pressure, and mechanical load in the joint. A gasket can fail even when it is installed correctly if its material is chemically incompatible or cannot maintain compression in service. For difficult services, use Fluid Sealing Association gasket selection guidance to confirm chemical, temperature, and load compatibility.
- PTFE: Excellent chemical resistance and low leak risk in many aggressive chemical services.
- Graphite: Good for high temperature, but it may contribute to flange-face corrosion in some environments.
- Rubber (EPDM, NBR, Neoprene): Suitable for water, oil, and general utility lines depending on the elastomer type.
- Compressed non-asbestos fiber: Common in utilities, water treatment, and HVAC.
Note: Many repeat flange leaks in chemical and utility plants begin with incorrect gasket material selection, not with a tightening problem. Always check compatibility with both the process fluid and the real operating temperature.
The flange surface finish also affects how the gasket performs:
- A rougher finish can improve grip for softer gaskets and reduce movement.
- A finish that is too smooth may reduce bite and increase the risk of leakage or blowout.
- A damaged or corroded facing can defeat even the correct gasket material.
Summary Table: Gasket Material Impact
| Material | Corrosion Resistance | Temperature Range | Typical Use |
|---|---|---|---|
| PTFE | Excellent | -200 to 260°C | Chemical service and corrosive pipelines |
| Graphite | Good | -200 to 450°C | High-temperature service |
| Rubber | Moderate | -40 to 120°C | Water and oil utility lines |
How to fix a flange gasket leak
Identifying Problems
The first step is to identify why the joint leaked, not just where it leaked.
Technicians usually begin with visual inspection, bolt pattern review, flange-face inspection, and gasket-condition assessment. The goal is to determine whether the problem was caused by material incompatibility, uneven compression, flange damage, or installation error.
A practical diagnostic sequence includes:
- Check whether the gasket was under-compressed, over-compressed, or unevenly compressed
- Confirm whether the gasket was reused
- Look for chemical attack, swelling, cracking, softening, or hardening
- Inspect flange faces for scratches, corrosion, dents, or embedded debris
- Check bolt condition and whether tension was lost unevenly
- Review vibration, thermal cycling, and service history at the joint
| Diagnostic Method | Signs / Indicators |
|---|---|
| Visual Inspection | Little change in gasket thickness, faint flange marks, surface residue, wetness pattern |
| Chemical Attack | Cracking, softening, discoloration, swelling |
| Hardening of Elastomers | Brittle or cracked gasket material |
| Installation Issues | Powder, pits, off-center seating, shifted gasket |
| Uneven Compression | Stress cracks, uneven thickness, partial flange contact marks |
| Over Compression | Crushed or damaged gasket |
| Re-use of Gaskets | Multiple compression lines or distorted sealing body |
Choosing a Replacement Flange Gasket
Selecting the right replacement gasket is critical to stopping repeat leaks.
Engineers and maintenance teams should match the gasket to the real service conditions, not simply replace it with “the same thing as last time.” A gasket that failed early may have been wrong for the application from the beginning. Before selecting a replacement, confirm the flange standard, size, facing, and pressure class so the gasket style matches the joint correctly.
| Criteria | What to Check |
|---|---|
| Pressure Rating | Maximum pressure the gasket can withstand without blowout or loss of seal |
| Temperature Resistance | Ability to handle startup, shutdown, and operating temperatures |
| Chemical Compatibility | Resistance to the process media and cleaning chemicals |
| Flange Type and Size | Correct facing style, dimensions, and seating compatibility |
Correct sizing and material matching improve long-term reliability and reduce the chance of another leak event at the same joint.
Installation Steps
Correct installation prevents repeat gasket failure.
Even the right gasket will leak if the flanges are misaligned, the bolts are tightened unevenly, or the gasket is not centered properly. For critical bolted joints, follow a controlled assembly approach aligned with ASME PCC-1 and a practical zero-leakage flange assembly workflow.
- Align the flanges using alignment tools and confirm the joint is not under pipe stress.
- Clean and inspect the flange faces before placing the new gasket.
- Insert the gasket evenly and center it between the flange faces.
- Lubricate bolt threads and nut-bearing surfaces where the bolting procedure requires it.
- Hand-tighten bolts in a crisscross pattern.
- Use a torque wrench to tighten in controlled increments and multiple passes.
- Inspect the joint and perform a pressure test before returning it to service.
Tip: Do not use torque alone as a shortcut for good assembly. Alignment, face condition, gasket centering, and bolt sequence are just as important as final bolt load.
Testing the Repair
Testing confirms whether the repair is actually complete.
Technicians should not rely on appearance alone. A joint that looks dry during assembly may still leak under pressure or after thermal cycling. A practical gasket installation and verification reference is the ESA/FSA gasket installation procedure.
| Testing Procedure | Description |
|---|---|
| Visual Inspection | Check for surface damage, flange deformation, gasket seating, and bolt condition |
| Dimensional Inspection | Verify fit, alignment, and flange-face condition |
| Pressure Testing | Use hydrostatic or pneumatic tests to confirm sealing performance |
| Nondestructive Testing (NDT) | Use ultrasonic or magnetic particle methods where required |
| Torque and Tightness Verification | Confirm bolts reached the specified tightening condition |
| Material Testing | Check hardness, composition, or compatibility when failure is recurrent |
These checks help confirm the leak has actually been eliminated and that the same failure mode will not return immediately after startup.
When to replace a flange gasket
Spotting Gasket Failure
Early detection prevents larger joint failures and unplanned shutdowns.
Common signs of gasket failure include:
- Visible leaks or drips around the flange joint
- Corrosion or discoloration on flange faces
- Loose or uneven bolts
- Unusual vibration or noise from the joint area
- Cracks, swelling, brittleness, or extrusion in the gasket material
Routine inspection helps identify leak development before it becomes a shutdown event. On critical systems, hidden leakage may also be detected with ultrasonic or infrared inspection.
Preventive Care
Consistent preventive care reduces gasket failures and improves joint reliability.
Plants with fewer flange leaks usually control the same basic practices well:
| Preventive Measure | Benefit |
|---|---|
| Proper installation | Creates even sealing load and reduces early leakage |
| Correct material selection | Matches the gasket to pressure, temperature, and fluid |
| Routine inspections | Detects wear, corrosion, relaxation, or misalignment early |
| Use of high-quality gaskets | Improves compression behavior and sealing integrity |
| Flange protection | Prevents face damage during storage and handling |
| Environmental shielding | Reduces external damage in harsh or corrosive conditions |
Technicians should use calibrated torque tools, follow controlled bolting patterns, and document repeated joint failures so chronic problem locations can be redesigned or monitored more closely.
When to Replace
Replace the gasket whenever sealing integrity has been lost or the joint has been opened.
Typical replacement triggers include:
- The gasket shows cracks, swelling, brittleness, crushing, or visible extrusion.
- The flange faces show corrosion, scratches, pitting, or irregular contact marks.
- The bolts lose tension or show fatigue-related issues.
- The system keeps leaking despite retightening or reassembly.
- Maintenance history shows repeated trouble at the same joint.
Practical rule: Do not reuse flange gaskets on critical joints. A reused gasket may look acceptable but has already lost part of its original compression behavior.
Good maintenance records help teams decide whether they are dealing with a one-time gasket issue or a repeat joint-design problem involving flange condition, vibration, misalignment, or wrong material selection.
Flange gaskets paired with sound flanges and proper assembly solve most common pipe-joint leakage problems.
They reduce downtime, improve safety, and support more predictable maintenance planning.
Proactive maintenance and correct gasket selection support long-term reliability.
Teams that inspect joints regularly, replace damaged gaskets early, and correct flange-face or bolt-load problems save more than teams that simply retighten leaks until the next shutdown.
Expert input is especially useful on difficult services.
For chemical exposure, thermal cycling, lined flanges, high-pressure joints, or repeated leakage at the same location, it is worth reviewing gasket material, flange finish, and bolting practice together rather than treating the gasket as the only variable. If the same joint keeps leaking, review the common causes of flange leakage instead of simply retightening the bolts again.
FAQ
What causes flange gasket leaks?
Improper installation, wrong gasket selection, damaged flange faces, or uneven bolt load are the most common causes.
Leaks also develop when gaskets are reused, attacked chemically, or exposed to vibration and thermal cycling that reduce sealing stress.
How often should flange gaskets be inspected?
Inspect flange joints during routine maintenance and at least every six months in many general services.
Critical systems, corrosive service, high vibration, or repeated leak history may require more frequent inspection.
Which gasket material works best for chemical pipelines?
PTFE is often chosen for chemical pipelines because of its strong chemical resistance.
However, the best material still depends on temperature, pressure, flange type, and the exact media in the system.
| Material | Best Use Case |
|---|---|
| PTFE | Chemical pipelines |
| Rubber | Water and oil lines |
| Graphite | High-temperature service |
Can technicians reuse flange gaskets?
In most cases, technicians should not reuse flange gaskets.
Once compressed, the gasket no longer behaves like a new sealing element. Reuse increases the risk of repeat leakage and uncertain sealing performance.
What signs show a gasket needs replacement?
Cracks, swelling, brittleness, visible leakage, loss of bolt tension, or repeated leakage at the same joint are all strong replacement indicators.
Corrosion or damage on the flange faces should also trigger a closer rebuild review.
Technical Review Basis
Reviewed for: flange leakage diagnosis, gasket replacement logic, bolted-joint assembly, and piping maintenance practice.
Suggested reviewer title: Piping / Sealing Application Engineer
Source basis: gasket failure diagnosis practice, flange bolting procedures, material selection logic, leak testing workflow, and plant maintenance troubleshooting.
Last updated: 2026-03-26