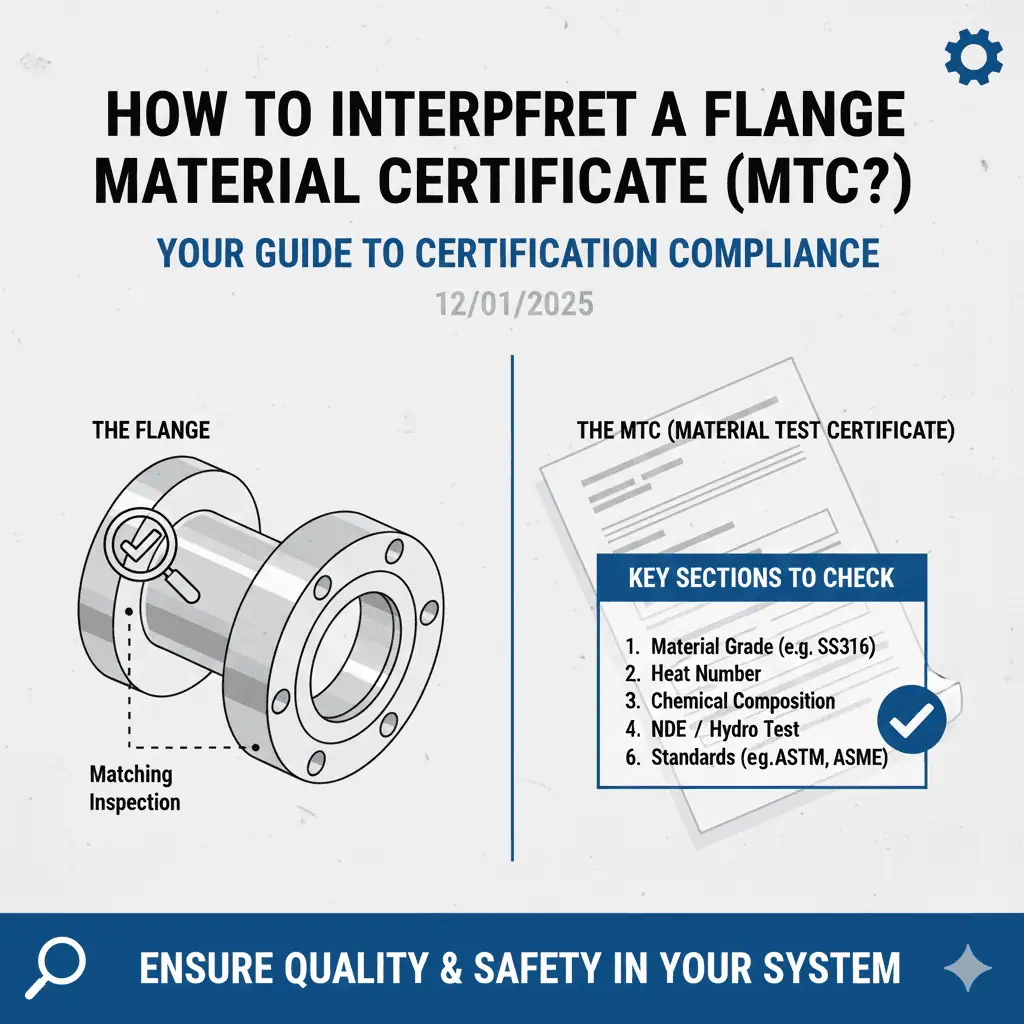
You need to interpret a flange material certificate (MTC) to confirm that each flange meets the ordered standard, stays traceable to its heat/lot, and is safe for the intended pressure boundary service. In practice, the MTC is only useful when it matches the physical flange markings (size/class/grade/heat number) and when the reported tests align with the purchase order and the referenced material specification. For projects that require third-party witnessing or higher traceability, you will also see EN 10204 document types (commonly 3.1 or 3.2) referenced on the certificate.
If you want a fast, field-ready workflow, use this acceptance sequence:
- Identity match: heat number, material grade, size/class, face type, and any special suffix (H, L, N, LF2, etc.) must match the flange stamping and the purchase order.
- Document type: confirm whether the job requires EN 10204 3.1 vs 3.2 (or an equivalent customer requirement) before you look at the numbers.
- Chemistry + mechanicals: compare the reported values to the ordered material spec (ASTM/ASME/EN/DIN) and verify the test piece is from the correct heat/lot.
- Heat treatment + NDT: confirm the required heat treatment route and any supplementary NDT/impact tests are present and signed off.
- Red flags: mismatched heat numbers, “typical values” without test results, missing signatures/stamps, or copied/edited-looking PDFs are stop points.
Quality assurance and receiving inspection are easier when you align the inspection method to the risk: surface condition, dimensions, material verification (PMI), and—when required—pressure testing and volumetric NDT. The table below is a practical mapping you can use during incoming inspection:
| Inspection Method | Description |
|---|---|
| Visual Inspection | Checks flange faces, RTJ grooves, bore transitions, and edge breaks for dents, laps, gouges, rust scale, or machining chatter that can compromise sealing. |
| Dimensional Inspection | Verifies OD/ID, bolt circle, thickness, facing finish requirements, and alignment features against the flange standard and the ordered drawing/spec. |
| Material Verification | Uses PMI (commonly XRF/OES) to confirm alloy family/grade and to catch mixed heats or wrong materials despite “good looking” paperwork. |
| Pressure Testing | Applies only when specified for the component/system; do not assume a separate “flange pressure test” replaces correct material compliance. |
| Ultrasonic Testing | Detects internal discontinuities (where required by spec/customer) that you cannot see at the surface. |
Field case (mix-up that passes a quick glance): A receiving team accepted a pallet based on the packing list, but two flanges were from a different heat. The MTC was valid—for the pallet—but the two pieces had different heat stamps. That is why identity matching (heat number + grade + stamping) comes before chemistry/mechanical review.
You help pipelines work well by picking material that fits the service and by treating MTC review as part of the pressure-boundary risk control, not as paperwork.
Flange material certificate basics
What is an MTC?
A material test certificate (MTC) is an inspection document that records the measured test results for a specific heat/lot of material used to produce a flange, along with the references to the governing specification(s).
When you read a flange material certificate, focus on whether the document allows you to (1) identify the exact material heat and (2) verify that required tests were performed for the ordered standard and any supplementary requirements. In a typical flange MTC/MTR package, you will see sections such as:
- Type of material certificate / inspection document (e.g., EN 10204 2.1/2.2/3.1/3.2)
- Administrative information (PO/line item, quantity, dates)
- Manufacturing process (forging route, heat/lot definition, traceability statements)
- Bend test result (only when specified; not universal for all flange forgings)
- Hydro test result (only when specified; many flange standards rely on material compliance + dimensional checks, not a standalone hydro test)
- Heat treatment details (solution anneal/normalize/Q&T, as applicable)
- Special requirements (customer notes, marking, packaging, PMI)
- Supplementary requirements (impact test, corrosion test, ferrite, NACE/AMPP notes, etc.)
- Non-destructive testing (PT/MT/UT/RT—only when required)
- Marking details on the product (grade, size, class, heat number, standard)
Each section either strengthens traceability or confirms compliance. If a section is irrelevant to your ordered standard, treat it as “nice to have,” not as proof of compliance.
Why MTCs matter for quality assurance
You use an MTC to prevent wrong-material installation and to prove compliance when your system is audited, insured, or regulated.
For stainless flange supply chains (for example Sunhy Stainless Steel Flanges), the practical value is the same: the MTC lets you confirm the ordered grade (such as ASTM A182 F316/316L) and shows the measured chemistry/mechanical results tied to a heat number. That traceability is what supports acceptance decisions when a failure investigation, repair, or recall happens years later.
In engineering terms, an MTC is useful only when it links the physical flange to measurable test results and to a defined standard revision—without that chain, the document becomes an unsupported claim.
| Role of MTCs in Compliance | Description |
|---|---|
| Material Traceability | Lets you follow a flange back to a heat/lot and its reported chemistry/mechanical results. |
| Regulatory / Client Approval | Supports audits, turnover dossiers, and project closeout documentation when material proof is required. |
| Compliance with Standards | Shows the flange is produced and tested to the referenced material + dimensional standards (ASTM/ASME/EN/DIN) and any supplementary requirements. |
Engineering example (wrong grade, right dimensions): A Class 600 weld neck flange fit perfectly during trial assembly, but the MTC showed the heat was an unintended grade with lower corrosion resistance for chloride service. The flange would have “worked” mechanically—until corrosion accelerated at the weld/HAZ. MTC review prevented an expensive turnaround.
Types of mill test certificates
You will see different inspection document types depending on the project’s traceability and witnessing requirements.
For many international projects, EN 10204 document types are used to define the level of verification. The higher the criticality (pressure boundary, hazardous media, high temperature, pharmaceutical validation, offshore, etc.), the more likely you will need a 3.1 or 3.2 document rather than a simple declaration.
| Certificate Type | Key Features | Applications |
|---|---|---|
| EN 10204 Type 2.1 | Declaration of compliance; no test report included | Low criticality items where specific test data is not required |
| EN 10204 Type 2.2 | Compliance with summary of inspections; no specific test results | Basic receiving control where traceability is limited |
| EN 10204 Type 3.1 | Specific test results; validated by an inspection representative independent of production | Common requirement for pressure-boundary components and traceable lots |
| EN 10204 Type 3.2 | 3.1-level results plus third-party involvement/witnessing as agreed | Highest assurance projects (offshore, critical duty, or strict client specifications) |
When third-party certification is required, confirm early which party is authorized (client inspector, notified body, classification society, or an agreed third party) and what they must witness. That scope should be visible on the certificate package, not implied.
You often need a 3.1 or 3.2 inspection document when you supply flanges to petrochemical, power, offshore, or pharmaceutical projects; when client witnessing is required; or when the contract requires defined traceability to a heat/lot and tested material properties. A certificate type decision is part of procurement engineering: the wrong document type can delay site acceptance even if the flange is physically correct.
Key sections of a flange MTC
Product identification and description
Start with product identification and description to confirm the certificate belongs to the flange in your hands.
These details are typically at the top of the flange material certificate. They allow you to verify that the paperwork matches the physical stamping and that the material results belong to the correct heat/lot. Check at least the following:
| Detail Type | Description |
|---|---|
| Heat Number | Unique identifier linking the MTC to the melt/heat and its reported chemistry/mechanical results. |
| Material Designation | Standard grade and spec (example: ASTM A182 F316/316L or ASTM A105/SA-105, as ordered). |
| Compliance Standards | Material and dimensional standards (example: ASTM A182 + ASME B16.5; or EN 10204 Type 3.1/3.2 as required). |
| Manufacturer Info | Legal entity, location, certificate number, issuing date, and responsible signatory. |
| Flange Markings | Permanent marks such as size, pressure class, grade, heat number, and standard references. |
Then cross-check the flange stamping requirements in the applicable flange standard (for example, the marking clause in ASME B16.5). If the flange has incomplete, inconsistent, or suspicious markings, stop the acceptance process and quarantine the item until traceability is confirmed.
Engineering example (stamp mismatch): A flange arrived with the correct size/class stamping, but the heat number on the rim did not appear on the MTC. The supplier later admitted the certificate belonged to a different production batch. This is a classic receiving-inspection catch that prevents mixed-heat installation.
Material specification and grade
Verify the material specification and grade against the purchase order and the service conditions before you accept the flange.
Confirm the ordered material standard first (ASTM/ASME/EN/DIN), then confirm the exact grade (F316 vs F316L vs F316H, A105 vs A105N, LF2 for low temperature, etc.). For stainless flanges, you will often reference the material standard ASTM A182/A182M. For carbon steel forged flanges, you commonly reference ASTM A105/A105M. Material grade affects corrosion resistance, toughness, temperature limits, and weld procedure requirements.
Pressure class selection is a separate step: class ratings come from the flange standard (for example ASME B16.5) and depend on material group and design temperature. Avoid accepting a flange based on “Class 600 is enough” statements—verify the pressure-temperature rating table for the ordered material group at the actual design temperature.
| Common flange forging grade | Typical use | What to verify on the MTC (practical) |
|---|---|---|
| ASTM A105 / SA-105 | Carbon steel flanges for ambient to moderate temperature service (when corrosion allowance/coating is acceptable) | C/Mn range and residual limits; required heat treatment condition; tensile/yield/elongation; any impact test if specified |
| ASTM A182 F304/304L | General corrosion resistance in many water/chemical services (chloride risk depends on environment) | Cr/Ni balance; “L” carbon limit for weldability; solution anneal route; ferrite/PMI if specified |
| ASTM A182 F316/316L | Improved pitting resistance vs 304 in many chloride-bearing services due to Mo content | Mo present in expected range; correct L/H suffix; solution anneal and rapid cooling; PMI for alloy confirmation |
Engineering example (suffix matters): A flange ordered as F316L was supplied as F316H. Dimensional checks passed, and chemistry looked “close,” but the carbon range and elevated-temperature intent differ. If your procedure qualification, corrosion risk, or fabrication plan depends on “L,” treat suffix mismatch as a nonconformance unless engineering formally approves the substitution.
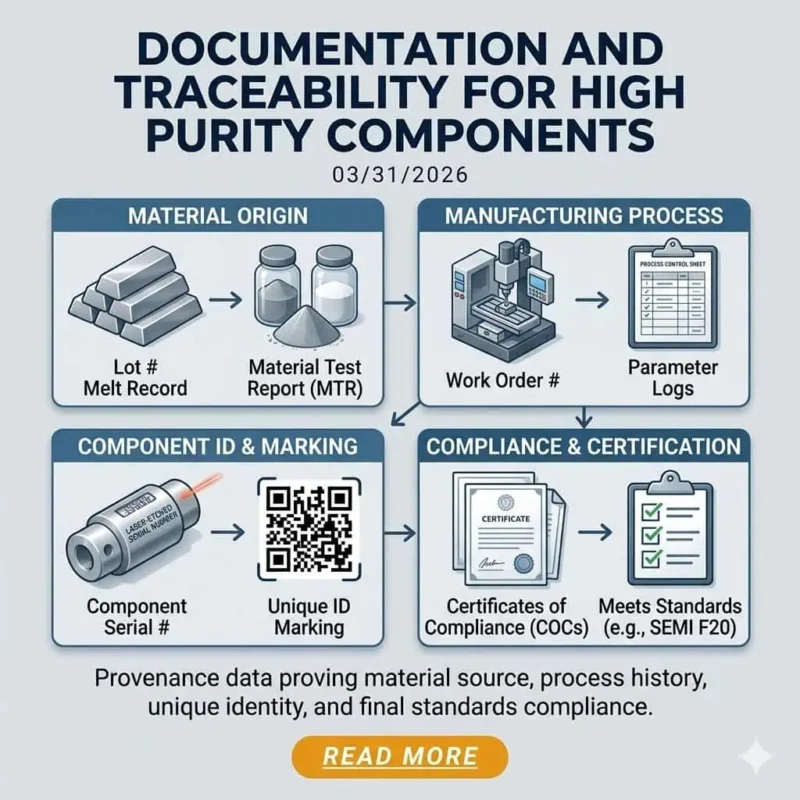
Heat number and traceability
Confirm the heat number and traceability statement so the flange can be tracked from raw material through forging and machining.
The heat number should be present on both the flange and the MTC. It links the flange to a defined melt/heat and its test results. In projects that use international inspection documents, traceability concepts are commonly aligned with standards such as ISO 10474. If the supply chain includes cut pieces, machining from bar/forging stock, or subcontract heat treatment, confirm the documentation shows how traceability is maintained across each step.
Practical check: if a supplier provides a single MTC for multiple heats, or if the certificate only references “batch” without a clear heat/lot definition, treat it as a traceability risk and request clarification before release to production.
Chemical composition (material test report)
Review the chemical composition to confirm the flange meets the ordered material grade and to catch mixed heats or wrong alloys.
The MTC should list measured chemistry (not only “typical” limits). You compare the reported values to the ordered material specification and any customer requirements (for example, low carbon for weldability, controlled sulfur for toughness, or specific alloying for corrosion resistance).
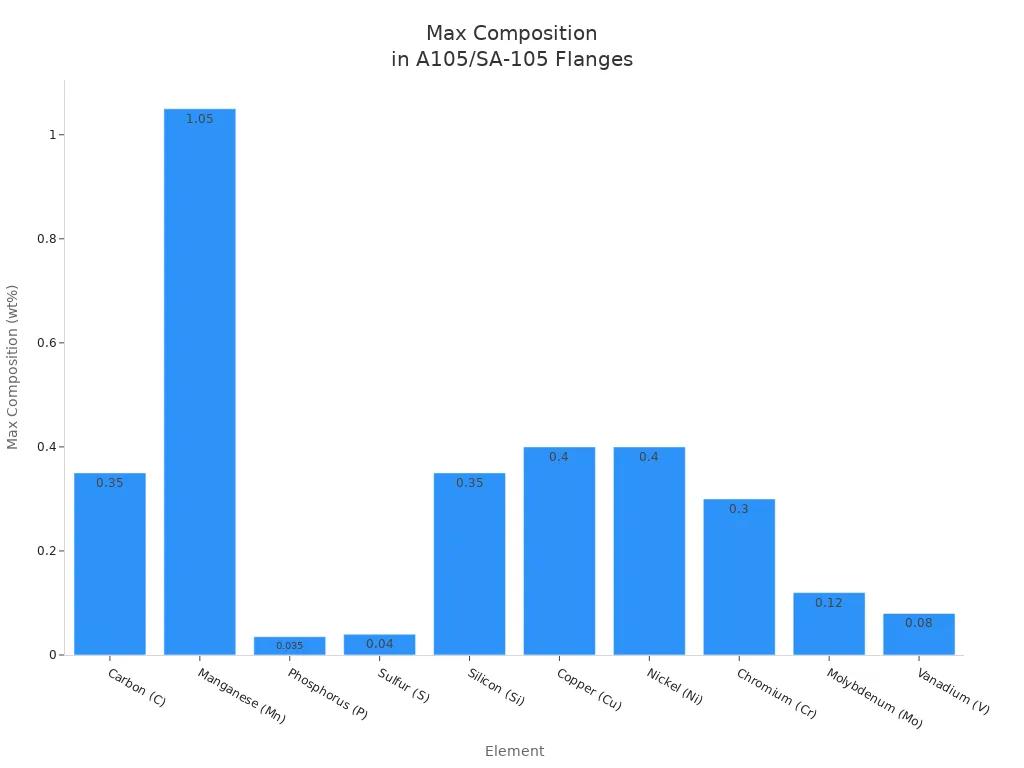
The table below shows a common receiving-check example for forged carbon steel flanges. Use it as a screening tool, then verify against the current ordered standard revision and any project notes:
| Element | Composition (wt%) — A105 / SA-105 (typical receiving-check limits) | Practical effect |
|---|---|---|
| Carbon (C) | ≤ 0.35% | Affects strength and weldability. Lower carbon generally reduces cracking risk and improves weldability. |
| Manganese (Mn) | 0.60 – 1.05% | Contributes to strength; also influences deoxidation and toughness in carbon steels. |
| Phosphorus (P) | ≤ 0.035% | Kept low to reduce embrittlement and maintain ductility. |
| Sulfur (S) | ≤ 0.040% | Excess can reduce toughness; machining grades may trend higher but should still meet spec. |
| Silicon (Si) | 0.10 – 0.35% | Deoxidizer; supports forging quality at controlled levels. |
| Copper (Cu) | ≤ 0.40% | Residual element; controlled to keep the steel within the intended chemistry class. |
| Nickel (Ni) | ≤ 0.40% | Residual element in A105; significant Ni would suggest a different alloy family. |
| Chromium (Cr) | ≤ 0.30% | Residual limit; higher Cr can indicate unintended alloying. |
| Molybdenum (Mo) | ≤ 0.12% | Residual limit in A105; Mo is intentional alloying in grades like 316 stainless. |
| Vanadium (V) | ≤ 0.08% | Residual/controlled; affects grain refinement in some steels at low levels. |
| Sum (Cu+Ni+Cr+Mo+V) | ≤ 1.00% | Controls residual alloying so A105 stays within carbon-steel expectations. |
| Sum (Cr+Mo) | ≤ 0.32% | Additional residual constraint used in many receiving checklists. |
For stainless flanges (such as F316/316L), chemistry review is also a corrosion-control step: confirm the alloying elements that drive corrosion performance are present and consistent with the ordered grade, and do not rely on “looks stainless” assumptions.
Tip: If the project risk is high (corrosion-critical, offshore, pharma validation), add PMI to receiving inspection. PMI validates alloy family at the part level, while the MTC validates tested results at the heat/lot level.
Mechanical properties (mill test report)
Check mechanical properties to confirm the flange has the required strength and ductility for pressure boundary service.
Look for tensile strength, yield strength, elongation, and hardness. Where specified (low-temperature service, dynamic loading, or client specs), also check impact toughness results and the test temperature. Mechanical data should be tied to the same heat/lot as the chemistry and should reference the applicable standard test method/spec requirement.
Engineering example (heat treatment shows up in the numbers): A forging can meet chemistry limits but fail acceptance because elongation is low or hardness is high—both are common signatures of incorrect heat treatment or improper cooling. Treat mechanical outliers as a process-control problem, not as a “paperwork issue.”
Heat treatment and testing results
Review heat treatment and test results to confirm the flange received the correct metallurgical condition for the ordered grade.
The MTC should list heat treatment steps appropriate to the material: carbon steels may be annealed/normalized or quenched & tempered when required; austenitic stainless steels are typically solution annealed and rapidly cooled to restore corrosion resistance and avoid harmful precipitation.
| Heat Treatment Process | Effect on Performance |
|---|---|
| Solution Annealed (austenitic stainless) | Restores corrosion resistance and ductility; helps minimize sensitization risk when properly performed and rapidly cooled. |
| Normalized | Refines grain structure; can improve toughness and reduce residual stress in many carbon steels. |
| Quenched & Tempered | Increases strength/hardness; must be controlled to avoid brittleness or excessive hardness for the service. |
For austenitic stainless grades used in flanges, solution treatment is commonly performed in the ~1010–1120°C range followed by rapid cooling (exact requirements depend on the ordered spec/grade and supplier route). If heat treatment records are missing, inconsistent, or do not match the ordered grade requirements, treat it as a nonconformance and request corrective action before installation.
Standards and compliance
Confirm the flange meets the correct material and dimensional standards for your project—and that the standards listed on the MTC match the purchase order.
Common references include material standards such as ASTM A182/A182M and ASTM A105/A105M, dimensional/pressure-class standards such as ASME B16.5 and ASME B16.47, and inspection document standards such as EN 10204. If your job uses controlled bolted joint assembly practices, it is also common to reference ASME PCC-1 for assembly guidance.
Reality check: listing a standard on an MTC is not the same as meeting it. The certificate must show test results that align with the standard’s requirements and the ordered revision/notes.
Manufacturer and certification details
Verify manufacturer and certification details to confirm the MTC is authentic, complete, and issued by the responsible party.
Look for the company name, address/country, certificate number, date of issue, responsible signatory, and (where applicable) third-party endorsement. If your contract requires EN 10204 3.2, confirm the third-party involvement scope is clearly stated and traceable to an agreed entity.
| Component | Description |
|---|---|
| Company Name | Legal manufacturer/issuer (not only a trading company name if the contract requires mill-issued documents). |
| Country of Origin | Origin statement consistent with contract and shipping documents. |
| Signature of Inspector | Responsible inspection representative (independent of production for 3.1-type expectations). |
| Date of Issue | Issue date consistent with production/heat treatment dates. |
| Name, Logo or Stamp | Issuer identification; some systems use digital signatures or QR verification. |
| Certified / Third-Party Endorsement | Required when the contract specifies third-party witnessing/validation (common in 3.2 scope). |
Engineering example (authenticity catch): An MTC that has identical “mechanical results” across multiple heats, or a PDF that appears edited, is a risk indicator. If the certificate cannot be verified by the issuer or does not match the flange stamping, do not release the flange to fabrication.
Note: Always match the MTC details with the physical markings on the flange for full verification, then verify the numbers against the ordered standard and any supplementary requirements.
How to review and verify an MTC

Cross-checking with purchase order and standards
Cross-check the MTC against the purchase order, the flange standard, and any project specifications before you accept or install the flange.
Use a receiving log and treat the review as an acceptance checklist:
- Paperwork set: PO/line item, packing list, MTC/MTR, and any third-party reports must be present and consistent.
- Quantity + damage: count pieces, inspect packaging damage, quarantine any impacted items.
- Marking match: compare size/class/grade/heat number on the flange to the certificate and PO.
- Dimensional check: verify critical dimensions and facing/RTJ details against the ordered standard/drawing.
- Material verification (when needed): apply PMI sampling or 100% PMI based on risk category and client requirement.
- Release decision: release only when identity + compliance are proven; otherwise quarantine and issue NCR/RFI.
| Step | What You Do |
|---|---|
| Documentation | Compare the MTC/MTR package against PO line items and confirm the required inspection document type is provided. |
| Visual Inspection | Check faces/grooves/bores for damage that can compromise gasket seating and sealing. |
| Quantity Check | Count items and confirm heat/lot coverage: do not accept “one certificate for everything” unless it is clearly defined and allowed. |
| Detailed Inspection | Confirm grade, class, face type, and any supplementary requirements (impact, NDT, ferrite, etc.) are satisfied. |
| Reporting | Record heat numbers, certificate numbers, and any nonconformances to preserve traceability. |
Common errors and red flags
Watch for these common errors and red flags when reviewing an MTC.
- Heat number mismatch between flange stamping and certificate.
- Wrong document type (for example, a 2.2-style summary provided where 3.1/3.2 is required by contract).
- Missing measured results (chemistry/mechanicals shown as “typical” or blank fields).
- Unclear test basis (no reference to the ordered standard/spec revision, or unclear inspection unit/lot definition).
- Missing signatory/endorsement required by the certificate type or contract.
- Suspicious uniformity (identical numbers across multiple heats, formatting that suggests copy/paste edits).
Tip: Treat “paper correct, metal uncertain” as the default risk. If you cannot prove identity and compliance, quarantine the flange until the supplier closes the gap with verifiable documentation.
Practical tips for efficient review
Make the review efficient by using a repeatable checklist and by linking MTC verification to installation controls.
Before assembly, inspect flange faces for nicks, corrosion, or tool marks; confirm gasket type and size; and verify bolt/nut grade and lubrication practice match the project method statement. During tightening, use a controlled pattern (commonly star/cross) with multiple passes and calibrated tools. After assembly, perform a leak check per your site procedure and document the flange joint ID, heat numbers, and certificate references for traceability.
| Tip | Why It Matters |
|---|---|
| Pre-Assembly Checks | Prevents face damage, wrong gasket selection, and bolt/nut mismatches that cause early leaks. |
| Assembly and Tightening | Controlled tightening improves gasket seating and reduces the risk of uneven load, rotation damage, and relaxation leaks. |
| Post-Assembly Testing | Finds leaks early and provides a documented control point before commissioning. |
| Documentation | Preserves traceability for audits, repairs, and future failure investigations. |
Note: Good MTC review reduces wrong-material risk; good assembly practice reduces gasket/bolting risk. You need both for leak-tight performance.
When you treat MTC review as a controlled engineering step, you reduce installation rework and avoid pressure-boundary failures caused by wrong grade, wrong heat treatment, or broken traceability.
- Verify heat number, measured chemistry, and mechanical properties are present and tied to the correct heat/lot.
- Make sure the flange meets the ordered material and dimensional standards, and that markings match the certificate.
- Use a checklist and keep records (heat number + certificate number) in your receiving and fabrication logs.
- If the certificate type, numbers, or signatory/endorsement is unclear, stop and request clarification before installation.
Learning more about bolted joint assembly practices helps you connect certificate verification to reliable, repeatable flange joint performance in the field.
FAQ
What is the main purpose of a flange material certificate?
The main purpose is to prove traceability and compliance: the MTC links the flange to a specific heat/lot and shows the measured test results required by the ordered standard.
Use it to confirm the material grade, verify measured chemistry/mechanical properties, and confirm required heat treatment/NDT or supplementary tests were performed. If the MTC does not match the flange markings (especially heat number), do not release the flange to fabrication or installation.
How do you match a flange to its certificate?
Match the heat number first, then confirm the full marking set (size/class/grade/standard) and the PO line item.
Locate the heat number on the flange stamping and verify the same heat appears on the MTC. Then confirm the material grade and flange standard references align with what was ordered. If any of these items are inconsistent, quarantine the flange and request correction or re-issuance from the supplier.
What should you do if you find missing information on an MTC?
Stop acceptance and request a corrected, verifiable certificate from the issuer.
Missing measured chemistry/mechanical results, missing heat treatment statements, or missing signatures/endorsements are not “minor paperwork gaps” for pressure-boundary components. Quarantine the item, raise an NCR/RFI, and require the supplier to provide the missing evidence (or third-party validation if contractually required) before use.
Which tests are most important on a flange MTC?
For most flange forgings, chemistry and mechanical properties are the baseline; heat treatment records and any specified supplementary tests are the next priority.
Chemistry confirms grade; mechanical properties confirm the required strength/ductility; heat treatment confirms the metallurgical condition. If the job specifies impact testing, NDT, ferrite, corrosion testing, or third-party witnessing (3.2 scope), those become equally critical acceptance items.
Can you use a flange without a valid MTC?
For pressure-boundary service, you should not install a flange without valid, matching traceability documents—unless engineering formally approves an exception with documented risk acceptance.
Without a valid MTC tied to the correct heat number, you cannot prove grade, test results, or heat treatment condition. That increases the likelihood of wrong-material installation and makes future audits or failure investigations much harder.

