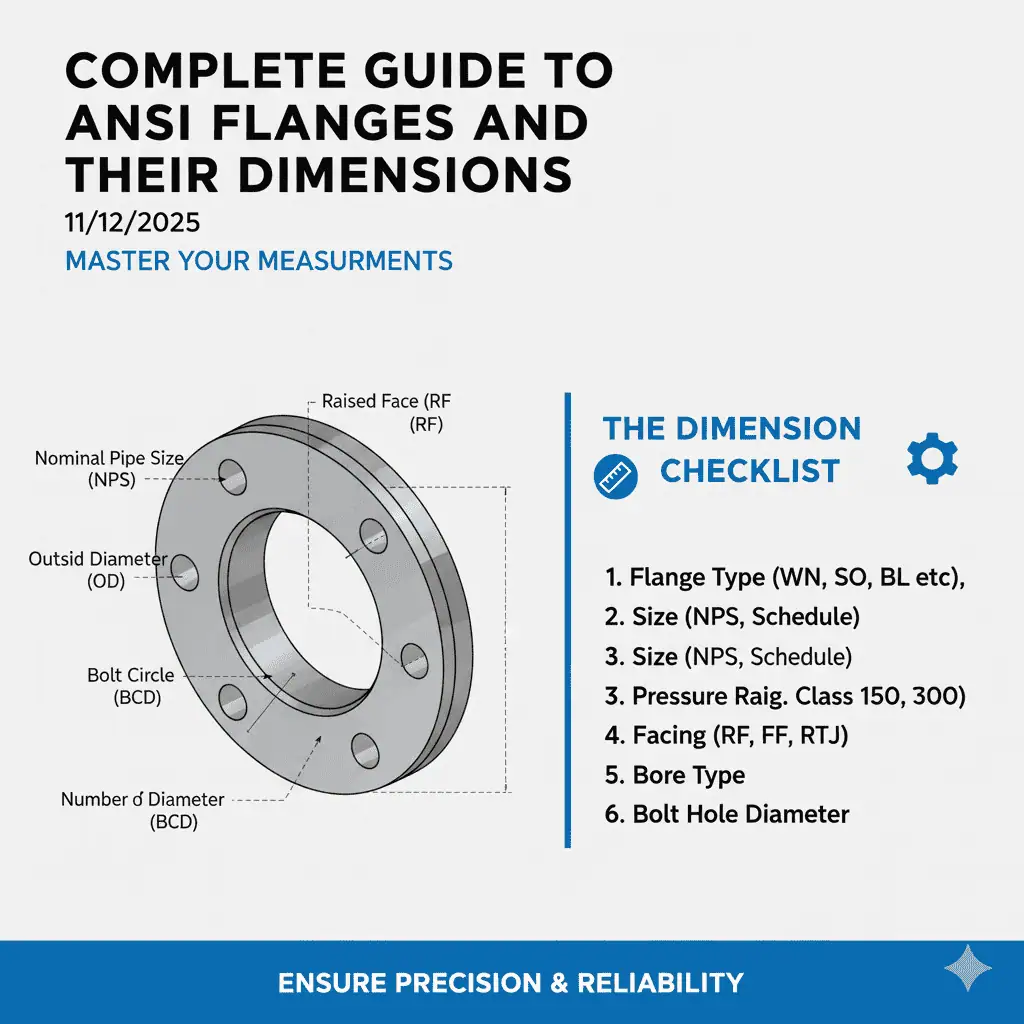
Selecting an “ANSI flange” is rarely a size-only decision. In real plant work, the most expensive problems come from face mismatch, bolt-circle mismatch, bore mismatch, or ordering a large-diameter replacement without confirming the correct series. That is why this guide focuses on the field errors that cause rework, leaks, and shutdown delays—not on repeating full dimension tables that are better handled on dedicated data pages.
In most industrial usage, “ANSI flange” is the shop-floor term for flanges built to ASME B16.5 for common sizes and ASME B16.47 for large diameters. Those standards govern dimensions, ratings, materials, marking, tolerances, and flange-joint details. If you are specifying forged stainless or alloy steel flanges, the material basis is commonly ASTM A182/A182M. If your site controls assembly quality through formal bolting procedures, the working reference is often ASME PCC-1.
This page answers one practical question: how do you choose an ANSI/ASME flange that will fit the existing component, seal correctly, and avoid field modification? If you need full drilling and size tables, use our ANSI flanges dimensions and selection guide or the ASME flange dimensions data page. If you need a standard-level overview, use our ASME B16.5 guide. This page is for the mistakes that happen before those tables are checked properly.
ANSI Flanges Overview
What This Guide Covers
This selection guide is built around four failure points that repeatedly cause returns and fit-up delays:
- RF vs FF mismatch — the flange will bolt up, but the wrong face can overload the mating equipment or create sealing problems.
- Series A vs Series B confusion — large-diameter flanges may look similar by nominal size, but the drilling and dimensions are not interchangeable.
- Bolt circle and bolt-hole mismatch — one wrong drilling pattern stops installation immediately.
- Bore and schedule mismatch — especially on weld neck flanges, the wrong bore creates internal steps, turbulence, and avoidable rework.
That is the real reason purchase orders fail. The flange is often manufactured correctly. The problem is that the wrong standard, facing, series, or bore was ordered against the mating component. For shutdown work, this article should be read as a prevention checklist rather than a product catalog.
Field example 1: A replacement flange arrived during a shutdown and matched the nominal size and class on the drawing. The joint still could not be assembled because the existing large-diameter line end was Series B and the replacement had been ordered as Series A. The outage delay came from incomplete identification, not from manufacturing quality. Prevention: verify the governing standard and series from the existing flange or certified drawings before the PO is released.
What “ANSI Flange” Usually Means in Practice
In most projects, “ANSI flange” is still used as a commercial term even though the governing dimensional standards are ASME. For common process piping sizes, you are usually working under ASME B16.5. For large-diameter flanges, you move into ASME B16.47. The first selection step is therefore not “304 or 316?” It is “What exact standard and mating geometry am I matching?”
That distinction matters because standard family controls the drilling pattern, facing system, class designation, and size range. Material grade becomes relevant only after the geometry and rating family are confirmed. In retrofit work, geometry errors stop installation faster than material errors.
| Selection Question | Why It Matters | Typical Failure if Ignored |
|---|---|---|
| Which standard governs this flange? | Controls drilling, facing, size range, and class rules | Wrong bolt pattern or wrong dimensional family |
| What is the mating face type? | Controls gasket style and contact geometry | Leakage or equipment flange damage |
| Is the existing large-diameter flange Series A or B? | Controls interchangeability in ASME B16.47 | Field non-fit and return |
| Does the bore match the pipe schedule? | Controls flow path, fit-up, and weld prep | Internal step, erosion, or re-machining |
| Has the pressure-temperature case been checked? | Controls allowable rating at service temperature | Underrated selection or false safety margin |
ANSI Flange Dimensions Verification
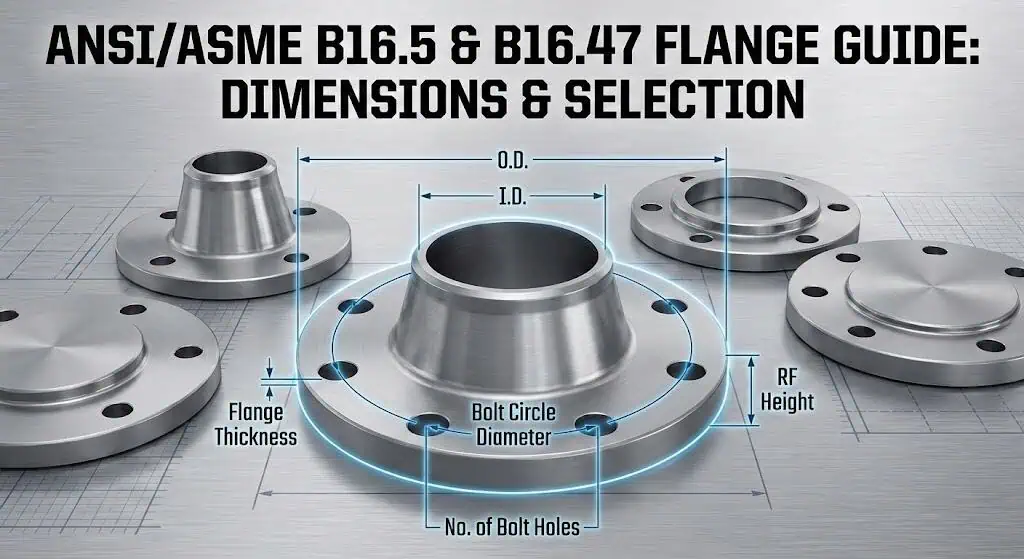
Do not start with “It looks right.” Start with the six dimensions that decide interchangeability. If one of these is wrong, the flange may still be perfectly manufactured and still be unusable at site.
- Nominal Pipe Size (NPS): a designator, not a direct outside diameter for every size range.
- Outside Diameter (OD): changes with size and class and is one of the fastest visual checks.
- Bolt Circle Diameter (BCD): the first fit-up check for drilling compatibility.
- Number and Diameter of Bolt Holes: must match the mating flange exactly.
- Inside Diameter / Bore: especially important on weld neck flanges and schedule matching.
- Facing Geometry: RF, FF, or RTJ determines the gasket and seating strategy.
On replacement jobs, dimension verification should happen before material discussion becomes the main topic. That sequence saves time because the first site failure is usually mismatch in drilling or bore, not chemical composition.
The Dimensions That Stop Installation First
The fastest way to avoid the wrong ANSI flange is to verify the dimensions in the order they fail in the field. In practice, the first hard stop is usually the drilling pattern, not the material grade.
| Dimension to Check | What It Controls | What Happens if It Is Wrong |
|---|---|---|
| Bolt Circle Diameter | Whether the bolts even line up | The flange cannot be installed without modification |
| Number of Bolt Holes | Load distribution and drilling match | Immediate mismatch at fit-up |
| Bolt Hole Diameter | Bolt fit and tolerance window | Binding, forced assembly, or wrong hardware |
| Bore | Pipe schedule match and internal flow profile | Weld prep conflict or internal step |
| Facing | Gasket contact and seating geometry | Leak path or equipment damage risk |
Field example 2: A weld neck flange was ordered by size, class, and material only. The receiving team discovered at fit-up that the bore did not match the heavier-wall pipe. The flange could still be salvaged, but only by machining and reinspection. The error came from omitting the schedule requirement on the purchase order. Prevention: include flange type and bore/schedule language whenever the internal profile matters.
Bolt Circle Diameter (BCD): The First Compatibility Check
BCD is the first dimension you should verify when you suspect a standards mismatch. If the bolt circle is wrong, the rest of the flange may be irrelevant because the bolts will not seat correctly. This is also one of the quickest ways to catch confusion between ASME-based and EN/DIN-based drilling patterns.
For replacement work, the safest practice is to verify the existing flange directly rather than relying only on old tag data. In shutdown work, mislabeled or undocumented legacy piping is more common than teams expect. Where drawings are old or mixed-source, field measurement should be treated as confirmation, not as an optional extra.
Bore Match: The Overlooked Ordering Detail
Bore errors do not always stop installation, but they create quality problems immediately. On weld neck flanges, the bore should match the pipe schedule closely enough to avoid a flow disturbance or weld-prep mismatch. On slip-on flanges, the bore logic is different because the pipe slips into the flange. That is why the flange type must always be part of the ordering description.
If the line carries erosive service, solids, high velocity, or cyclic duty, the wrong bore profile becomes more than a fabrication inconvenience. It becomes a service-life problem. For utility lines, the impact may be limited to fit-up and weld quality; for process lines, it can become a reliability issue.
RF vs FF: The Face Selection Error That Causes Avoidable Trouble
RF vs FF is not a cosmetic choice. It is a load-path and sealing decision. The mating face determines how gasket stress is developed and how the connected equipment flange sees compressive load.
- Raised Face (RF): concentrates gasket load over a smaller seating area. Common on steel process flanges.
- Flat Face (FF): distributes load across the full face and is commonly specified where the mating equipment is more vulnerable to concentrated flange loading, such as cast iron, FRP, glass-lined, or certain lined systems.
- RTJ: a separate sealing system for severe service and not interchangeable with RF or FF.
The selection question is therefore not “Which face is better?” It is “What face does the mating equipment require, and what gasket system is the joint designed around?”
Finish also matters. Even when the face type is correct, the sealing result still depends on whether the face finish, gasket style, and assembly method suit each other. A machined face is not automatically suitable for every gasket option.
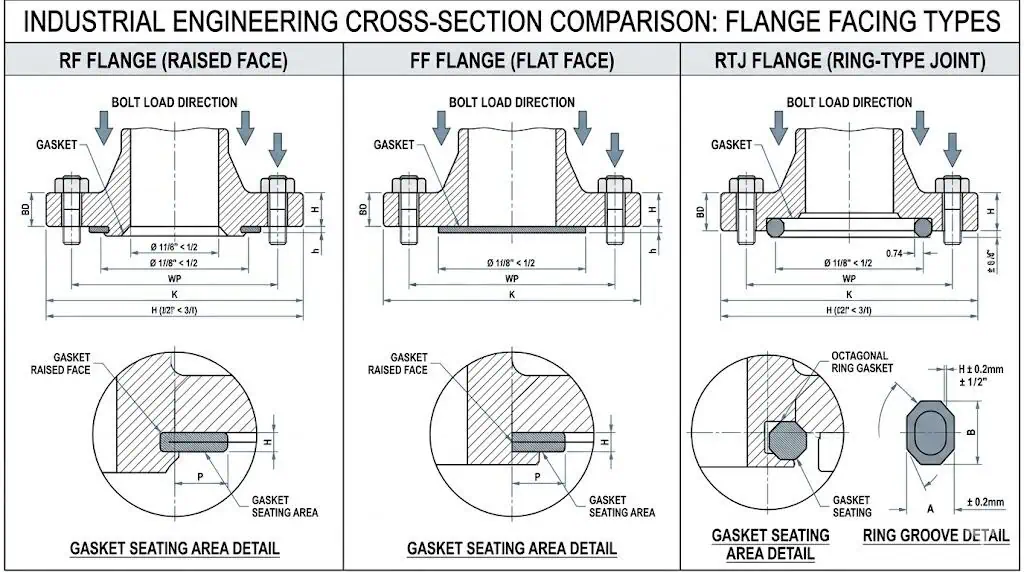
| Face Type | Typical Use Direction | Main Risk If Misapplied |
|---|---|---|
| RF | Steel piping and equipment with raised-face design intent | Can overload a flat-face equipment nozzle if mispaired |
| FF | Cast iron, FRP, lined equipment, and specified flat-face systems | Wrong gasket or wrong mating surface can reduce sealing reliability |
| RTJ | High-pressure severe service with ring-joint grooves | Cannot substitute for RF/FF without the correct groove and ring design |
Field example 3: A steel RF flange was installed against a flat-face equipment nozzle because the installer assumed “same size and same class” was enough. The joint could be tightened, but the face geometry and loading were wrong for the mating nozzle. The problem was caught before start-up, but only after the equipment vendor documents were rechecked. Lesson: always verify the face requirement from the mating component, not just from the piping class.
If you want a dedicated comparison of sealing-face logic, see our Raised Face vs Flat Face flange comparison. For this page, the key rule is simpler: match the existing equipment face exactly unless the design change has been reviewed and approved.
Series A vs Series B: The Large-Diameter Ordering Trap
Once you move into ASME B16.47, you must identify whether the flange is Series A or Series B before ordering a replacement. Large-diameter flanges in these two series are not interchangeable just because the NPS looks the same.
In maintenance work, this is one of the most common large-diameter ordering mistakes. Teams copy the nominal size and class from the old BOM but miss the series. The replacement arrives on time and still cannot be installed.
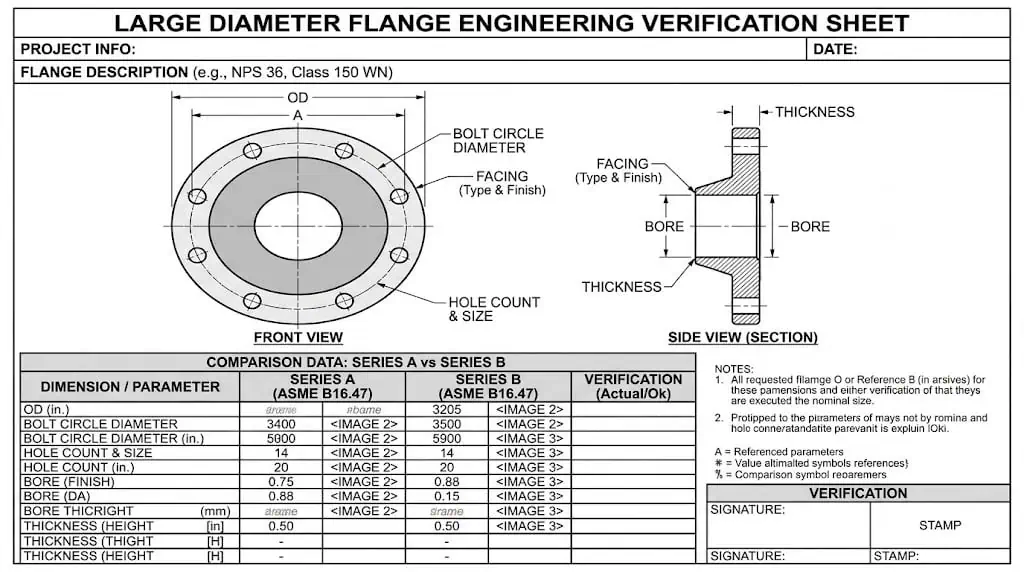
| Check Point | Series A | Series B |
|---|---|---|
| Standard family | ASME B16.47 | ASME B16.47 |
| Interchangeable with the other series? | No | No |
| What must be verified? | Bolt circle, holes, bore, thickness, facing | Bolt circle, holes, bore, thickness, facing |
| Replacement rule | Match the existing mating flange exactly | Match the existing mating flange exactly |
Do not rely on memory, rough measurement, or “it came from a pipeline project so it is probably one series.” Confirm the series from the equipment records, verified drawings, or direct dimensional check. If the existing system is old or mixed-source, treat this step as mandatory.
For large-diameter drilling and table data, use the flange dimensions page rather than putting all of those tables into this article. This page is about avoiding the wrong selection before those tables are even opened.
Pressure Classes vs Temperature: Why Class Is Not a PSI Label
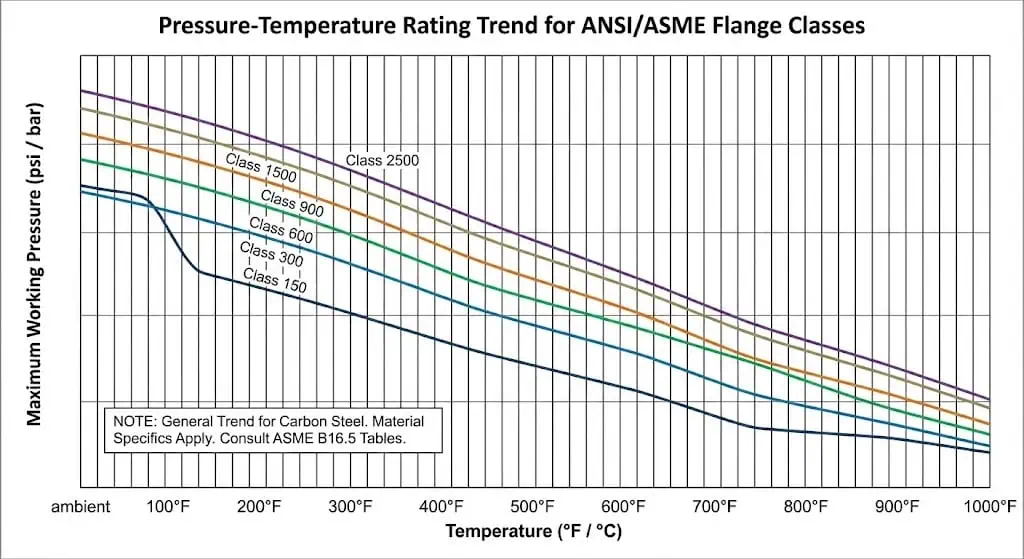
One of the most common purchasing shortcuts is to treat Class 150 or Class 300 as a direct PSI answer. That is not how ASME flange ratings work. The allowable pressure depends on the applicable standard, the material group, and the operating temperature.
A flange can be acceptable at ambient conditions and no longer be acceptable at the same nominal class once temperature rises. That is why the pressure-temperature tables in the governing standard are part of selection, not a later check. Startup, steam-out, hydrotest, and upset conditions should be reviewed if they are more severe than normal operation.
- Confirm the maximum operating pressure.
- Confirm the maximum and minimum design temperature.
- Verify the material group used in the applicable rating table.
- Check whether startup, steam-out, hydrotest, or upset conditions are more severe than normal operation.
Field example 4: A replacement flange was ordered by matching the stamped class on the old part, but the site later discovered the new service included a higher steam-out temperature than the previous duty. The geometry was correct, yet the review had to be repeated because the temperature case had not been checked against the proper material group and rating table. Prevention: verify the full service envelope before assuming a legacy class stamp remains suitable.
Do not release the order based only on the line pressure written on a pump datasheet or the class stamped on a legacy part. Review the actual service envelope first.
Selecting ANSI Flanges: The Engineer’s Checklist
Assess the Mating Component First
The flange you choose is often dictated by the weakest or least-forgiving mating component. If the nozzle is flat-face, the flange selection must respect that. If the equipment drawing shows a specific drilling pattern, that pattern wins over generic assumptions. If the line is a large-diameter ASME B16.47 replacement, the series must match what is already installed.
Material should also be reviewed in context, not as a default habit. For forged stainless or alloy flanges, the applicable material specification and corrosion environment should be checked alongside geometry. A dimensionally correct flange can still be a poor choice if the material and service envelope are mismatched.
| What You Inspect First | Why It Comes First | Typical Action |
|---|---|---|
| Mating flange face | Face mismatch creates sealing or loading problems immediately | Match RF to RF, FF to FF unless redesign is approved |
| Existing drilling / BCD | Determines interchangeability | Measure or verify against certified dimensions |
| Line size and bore requirement | Controls flow path and fit-up | Specify type + NPS + schedule/bore requirement |
| Service temperature | Changes pressure capability | Check the correct pressure-temperature table |
| Material and corrosion environment | Controls lifecycle and suitability | Select material from actual service, not habit alone |
Write the Purchase Description So It Cannot Be Misread
A weak purchase description is one of the main reasons ANSI flange orders go wrong. “4-inch stainless flange” is not an engineering description. It is barely a starting point.
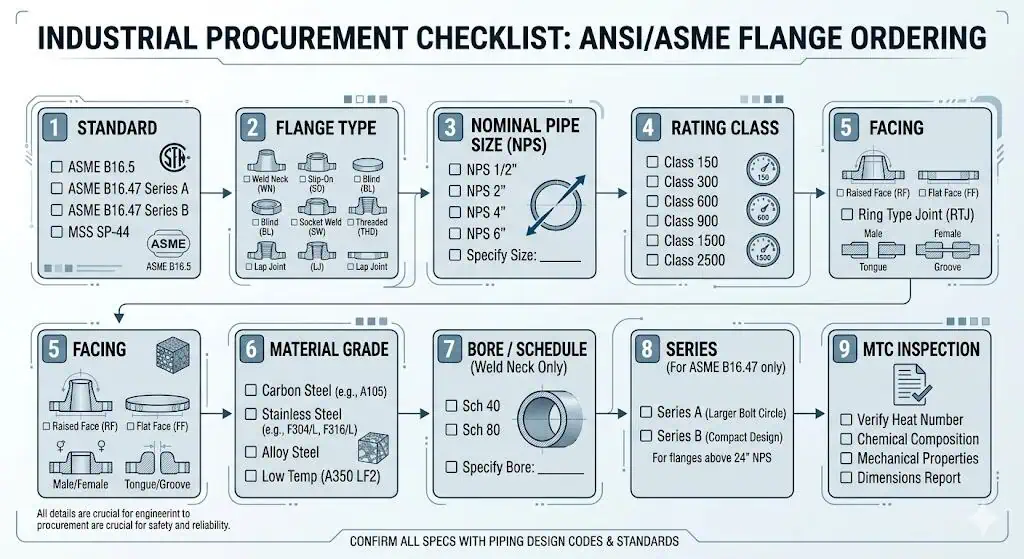
A workable order description should identify:
- Standard
- Flange type
- NPS
- Class
- Facing
- Material grade
- Bore or schedule requirement where applicable
- Series A or Series B for large-diameter B16.47 flanges
- Any documentation or inspection requirement
Example:
ASME B16.5, WN, NPS 4, Class 300, RF, ASTM A182 F316L, bore to match Sch 80 pipe, with MTC and required inspection notes.
Large-diameter example:
ASME B16.47, Series B, WN, NPS 30, Class 300, RF, ASTM A105, bore to project requirement.
In purchasing terms, the goal is to remove all ambiguity before the order leaves engineering. If the description can be interpreted in two ways, it probably will be.
Use These Checks Before You Release the PO
- Verify the governing standard — B16.5, B16.47, or another project requirement.
- Verify the mating face type — RF, FF, or RTJ.
- Verify the bolt circle and hole count — especially on replacement work.
- Verify the bore requirement — particularly for weld neck flanges.
- Verify the material and service temperature — class alone is not enough.
- Verify Series A or B — mandatory on large-diameter ASME B16.47 work.
- Verify the drawing or certified data source — do not rely on memory or mixed legacy labels.
If the job is a difficult retrofit, it is often worth checking the flange directly in the field before the PO is finalized. That is much cheaper than receiving the right-looking wrong part during an outage.
For a broader standard comparison across systems, see our ASME B16.5 vs DIN EN 1092-1 comparison guide. For general flange family differences, see JIS vs ANSI vs DIN flanges. Those pages are useful when the first question is “Which standard family am I in?” This page is specifically for avoiding selection and fit-up mistakes inside the ANSI/ASME flange workflow.
FAQ
What is the most important dimension to verify before ordering an ANSI flange?
The most important first check is usually the bolt circle diameter and drilling pattern.
If the bolt circle, bolt-hole count, or bolt-hole size is wrong, the flange will not assemble even if the nominal size and class look correct on paper.
Can RF and FF flanges be treated as interchangeable if the size and class match?
No.
RF and FF are different seating systems. Matching only the size and class is not enough. The mating equipment face and gasket arrangement must be respected to avoid loading or sealing problems.
Why is Series A vs Series B such a common ordering mistake?
Because both series can share the same nominal size family under ASME B16.47, but they do not share the same interchangeability.
If the series is not confirmed from the existing flange or verified project data, the replacement may arrive and still not fit.
Do ANSI flange classes represent a direct pressure value in PSI?
No.
Class 150, 300, and higher class designations are not direct PSI labels. The allowable pressure depends on the governing standard, the material group, and the service temperature.
What should be included in an ANSI flange purchase order description?
A correct description should include standard, type, NPS, class, facing, material, bore requirement where applicable, and Series A or B for large-diameter B16.47 flanges.
Without those details, the order is easy to misread and hard to verify.
When should I check the bore or schedule explicitly?
You should check it explicitly whenever the flange type and service make the internal profile important, especially on weld neck flanges.
If the bore does not suit the pipe wall thickness, you can end up with weld-prep problems, internal steps, or avoidable machining during installation.

