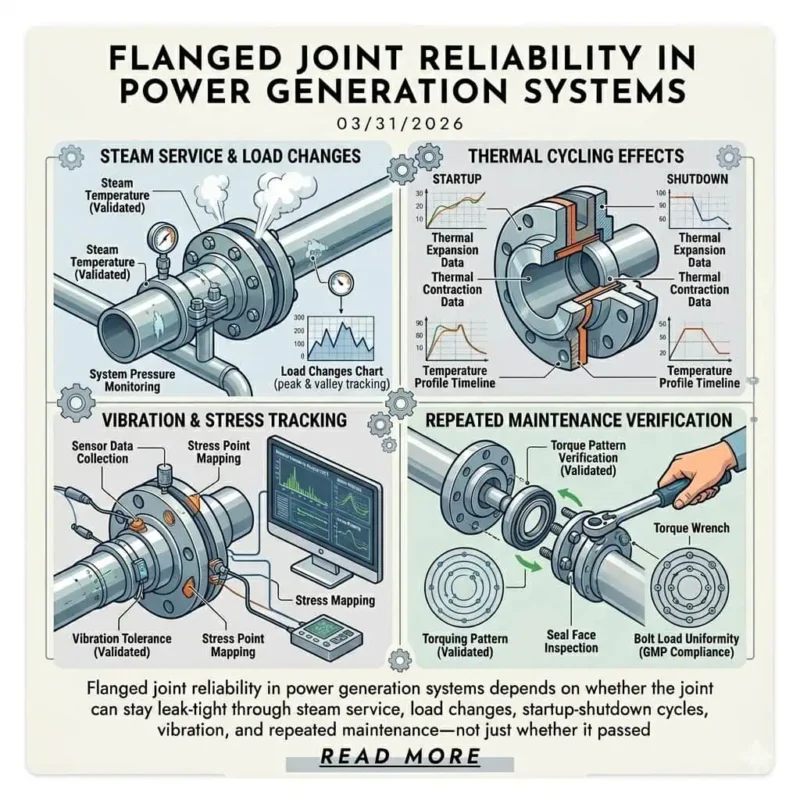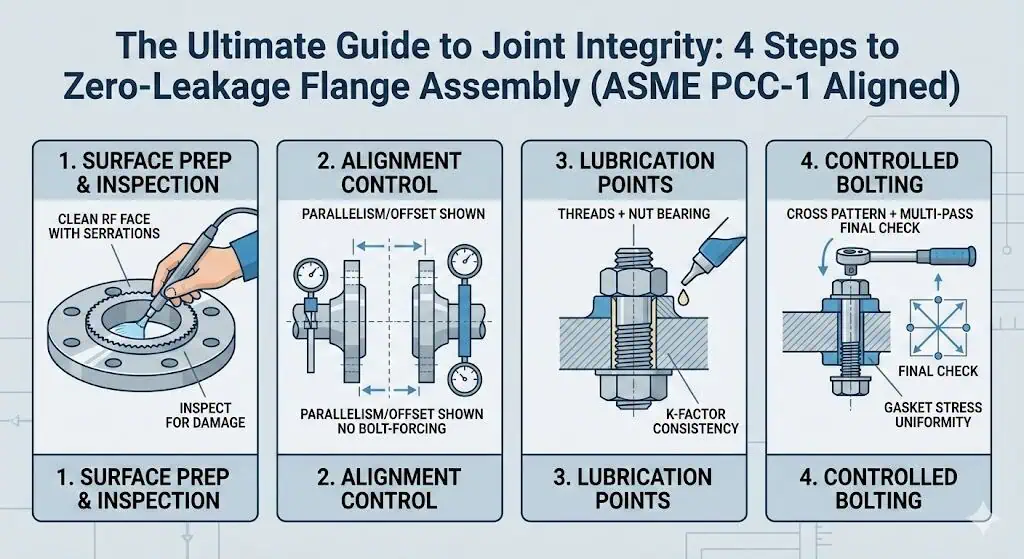
Achieving zero leakage in a flanged joint is primarily a workmanship and process-control problem. In the field, the most repeatable results come from a disciplined four-step workflow: (1) verified surface condition and cleanliness, (2) controlled alignment (no bolt-forcing), (3) a documented lubrication strategy with known friction behavior, and (4) a controlled tightening sequence with verification. ASME positions PCC-1 as a practical guideline set for improving bolted flange joint assembly quality, because leakage is often tied to inconsistent assembly practice rather than “mystery gasket failure.” ASME discussion of PCC-1 background

| Cause of Flange Leakage | Percentage |
|---|---|
| Insufficient compression (Low Bolt Load) | 68% |
| Excessive compression (Gasket Crush) | 14% |
| Incorrect product selection | 14% |
| Other | 4% |
The working definition of joint integrity is simple: the joint maintains sealing stress across expected pressure/temperature cycles without unacceptable leakage. In engineering terms, you are managing a system of springs (bolts) compressing a gasket between two faces; any loss of uniform gasket stress—through misalignment, friction scatter, embedment, relaxation, or poor surface condition—creates a leakage path. The purpose of ASME PCC-1 is to turn that reality into a controlled, auditable assembly process (surface prep, alignment, tightening method, and verification). ASME overview of PCC-1
Step 1: Precision Surface Preparation in Flange Assembly
Cleaning and Critical Inspection
Cleanliness is critical for flange joint integrity and effective leak prevention. In practice, “clean” means no loose scale, rust bloom, paint overspray, grease, or old gasket film at the gasket contact band. Even thin residue can act like a spacer, preventing full gasket seating and creating micro-channels that become leak paths once pressure and thermal cycling start. Surface-finish guidance for typical serrated flange facings commonly references 30–55 grooves per inch and roughness ranges used to help the gasket “bite” and conform. Flange face finish overview (grooves and roughness ranges)
Expert Tip: Treat the first 5 minutes as “failure prevention.” If you do not reject bad faces and bad fasteners at the bench, you will “discover” them during hydrotest or start-up.
Recommended inspection protocols include:
- Visual examination of the flange face for dirt, rust, paint, grease, or moisture (pay attention to the gasket contact band, not just the OD).
- Checking for old gasket residue (graphite/PTFE films) and embedded debris at serrations.
- Looking for radial scoring, dents, pitting, or scratches that cross the sealing area (cross-groove defects are higher risk than circumferential marks).
Engineering example (leak during hydrotest): A DN150 (6″) RF joint passed torque, then weeps immediately at hydro. Root cause: old graphite film left at two quadrants; the gasket never achieved uniform contact stress. Fix: mechanical cleaning to bare metal at the seating band, verify serration condition, then reassemble using the same gasket spec with controlled bolting. Prevention: define a “no visible residue” acceptance criterion and require a wipe test before gasket placement.
Gasket Seating Surface Finish
A proper gasket seating surface is essential for achieving zero-leakage. For common ASME B16.5-style RF/FF facings, industry guidance widely references serrated concentric/spiral finishes with surface finish bands such as 125–250 µin (≈3.2–6.3 µm Ra) as a practical range used for many soft/semi-metallic gasket types. Garlock guide (surface finish ranges) Wermac reference (groove count and roughness)
| Flange Joint Type | Maximum Roughness Value (Ra) |
|---|---|
| Tongue and Groove / Small Male and Female | 3.2 µm (125 µin) |
| Ring Joint (RTJ) | 1.6 µm (63 µin) |
| Other Flange Facings (RF/FF) | 3.2 to 6.3 µm (125 to 250 µin) |

Surface finish is not a “nice-to-have.” It directly affects (1) the gasket’s ability to conform, (2) micro-sealing path length, and (3) the risk of gasket slip/blowout under pressure pulses. If you change gasket type (soft sheet → spiral wound, for example), re-check the acceptable finish range; a mismatch typically shows up as either persistent weeping (too smooth for the gasket to grip) or crushed/damaged gasket (too rough or with cross-groove defects). Where gasket design factors (m/y) are used, treat them as part of a controlled design/verification workflow—not a substitute for good assembly practice.
Bolt and Nut Condition Verification
Bolts and nuts must be in optimal condition to translate torque into bolt load accurately. Friction scatter from damaged threads, corrosion, or galling can produce “on-paper torque” but low actual bolt tension. The “Free Run” test is a practical gate: the nut should travel the full stud length by hand without binding. Any jamming means you cannot trust torque as a proxy for bolt load—replace the fastener pair.
| Factor | Description |
|---|---|
| Bolt Load | Directly influences leakage and joint stiffness; uniform load distribution is the integrity target, not “highest torque.” |
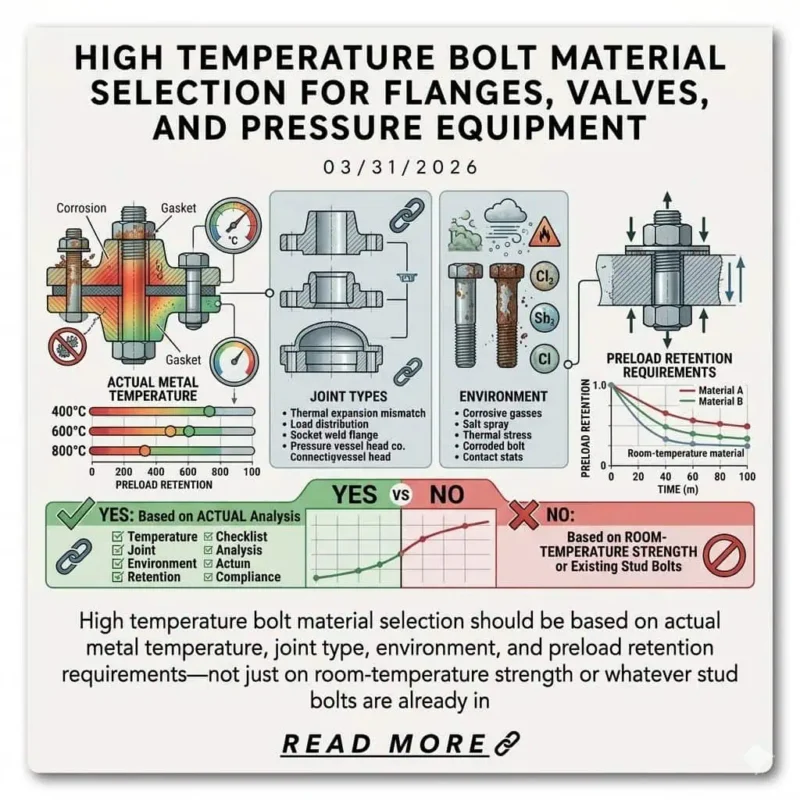
| Temperature | Affects load relaxation (creep/embedding) and differential expansion; high-temperature services often need tighter process control and verification. |
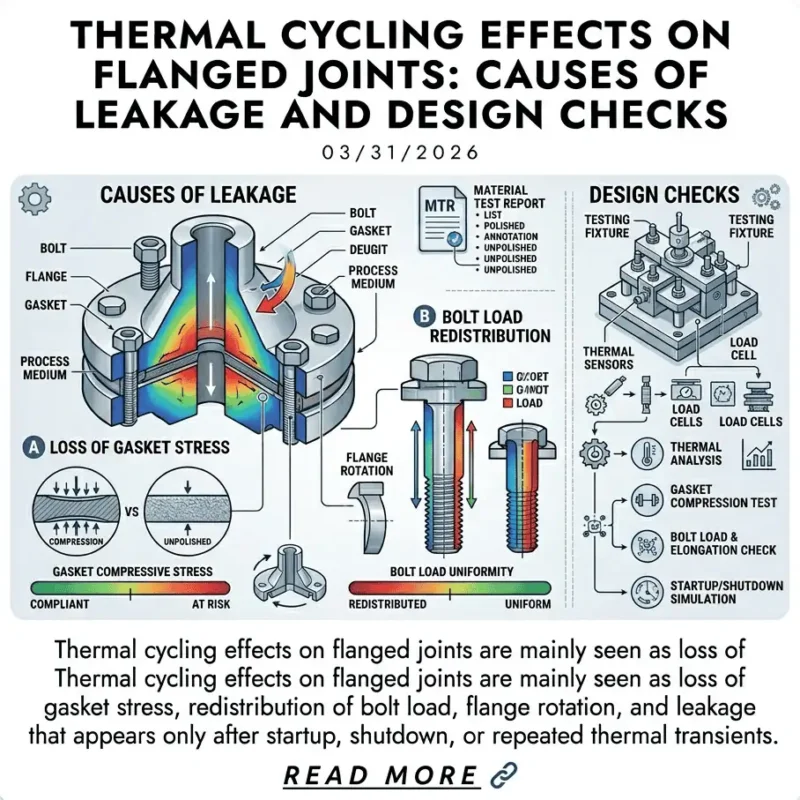
| Loading History | Cyclic pressure/temperature can reduce gasket stress over time; joints that “never leaked before” can start leaking after shutdown/start-up cycles. |
Checklist for surface preparation:
- Inspect flange face for scratches, gouges, pits, and cross-groove defects at the gasket contact band.
- Ensure bolts and nuts are free of corrosion, debris, burrs, and thread damage.
- Perform the “Free Run” test on 100% of fasteners.
- Confirm gasket seating surface finish is suitable for the gasket type and service severity.
- Document findings for leak testing, QA traceability, and future risk-based inspection (RBI).
Engineering example (false pass on torque): A joint was torqued to spec but leaked at start-up. Investigation showed thread galling on two studs; torque was consumed by friction, not bolt stretch. Corrective action: replace studs/nuts, apply specified anti-seize consistently, and repeat multi-pass tightening with a final check pass.
Surface preparation is the non-negotiable foundation for reliable assembly. If you skip it, every downstream control (alignment, lubrication, torque sequence) becomes an attempt to compensate for a preventable defect.
Step 2: Alignment Control for Flange Joint Integrity
Types of Flange Misalignment
Proper alignment is essential for maintaining flange joint integrity and preventing leaks. From an engineering standpoint, misalignment adds bending moment and shear at the gasket line, which the gasket cannot “average out.” The result is localized over-stress (crush) on one side and under-stress (leak path) on the other. The three failure-relevant misalignment modes observed during plant maintenance are:
- Parallelism error: flange faces not parallel; produces a wedge gap and highly non-uniform gasket stress.
- Rotational misalignment: bolt holes not oriented (two-holing problems); often tempts crews to “pull” with bolts.
- Axial offset: centerlines offset; creates shear at gasket and can damage spiral wound/soft gaskets during seating.
Engineering example (stored-energy joint): A maintenance team used studs to draw a misaligned spool into place. The joint initially held, then leaked after thermal expansion during ramp-up. Root cause: stored bending stress relaxed into gasket unloading. Prevention: correct pipe support and fit-up before bolting; if the spool cannot fit freely with minimal force, the joint is not ready to assemble.
Alignment Tolerance Standards (ASME)
ASME B31.3 provides an alignment criterion commonly referenced in piping work: before bolting, mating gasket contact surfaces should be aligned within 1 mm in 200 mm (1/16 in./ft), measured across any diameter. B31.3 alignment criterion reference Process piping guide reference (B31.3 alignment discussion)
| Standard | Section | Tolerance Description |
|---|---|---|
| ASME B31.3 | 335.1(c)(1) | Mating gasket contact surfaces must align within 1 mm in 200 mm (1/16 in./ft), measured across any diameter |
| ASME PCC-1 | Appendix E | Use controlled fit-up and verification methods before tightening; misalignment is treated as a risk factor for uneven gasket stress (apply site procedure and verification) |
Note: Verify alignment before gasket installation (straightedge/square/feeler, or laser tools for critical services). If the joint needs bolts as a “jack,” stop and correct fit-up first.
Avoiding Bolt-Induced Alignment
Never use bolts to force flanges into alignment. This introduces stored strain energy, distorts flange rotation, and produces a bolt load pattern that is unknowable from torque alone. It is also a safety problem: when a forced joint relaxes (temperature change, vibration, pressure cycling), the gasket stress can drop below sealing minimum and the joint can weep or fail. Use proper supports, come-alongs/chain blocks, flange spreaders where appropriate, and correct spool fit-up so bolts insert freely.
Tip: Record “fit-up” as a QA hold point: bolt insertion should be free, and gap/parallelism should meet the site acceptance criterion before any controlled tightening begins.
Step 3: Lubrication Strategy & Torque Coefficients
Lubricant Application Points
Lubrication is the dominant variable in converting torque into bolt tension. In most bolted joints, only a minority of applied torque becomes bolt stretch; the rest is consumed by thread and bearing friction. The practical goal is not “more lube,” but consistent lube so K-factor scatter is minimized across all studs. Recommended application points:
- Fill the working thread engagement region so the nut travels over lubricated thread flanks.
- Apply a thin, even coat to the nut bearing surface (nut face) to control bearing friction.
- Confirm consistent appearance/coverage on every stud; “one dry stud” can become “one low-load quadrant.”
- Avoid contaminating the gasket seating band with lubricant (especially with soft gaskets).
Engineering example (uneven preload): A flange leaked only at one quadrant. Torque records looked fine. Root cause: two studs were assembled dry after a tool change; they carried lower tension than their neighbors, unloading the gasket locally. Prevention: make lubrication a checklist hold point and require the same lubricant spec and method on 100% of studs.
Consistency and Friction Factor (K-Factor)
Torque-based tightening is only as reliable as the friction factor (Nut Factor, K-factor) you assume. The simplified torque relationship is commonly expressed as T = K × D × F, where K bundles thread and bearing friction effects. If K changes (different anti-seize, different surface condition, mixed fasteners), bolt tension changes even if your torque wrench reads the same. Fastenal engineering FAQ (T=KDF concept) Nut factor overview and formula
- Use lubricants compatible with service temperature and materials; verify the product’s temperature range and intended use (moly/nickel anti-seize, etc.).
- Use one lubricant type per job; mixing products is a common cause of K-factor scatter.
- Do not treat “general grease” as equivalent to engineered anti-seize for critical joints.
- For high-consequence joints, consider verification by bolt tensioning method, turn-of-nut with calibration, or tension measurement where feasible (site procedure dependent).
Torque Formula and Preload
The torque-preload relationship is simple in form and messy in reality. The widely used simplified equation is:
T = K × D × F
(Torque = Nut Factor [K] × Bolt Diameter [D] × Desired Preload [F])
Use this formula for controlled planning and documentation, not as a guarantee of actual bolt tension. The engineering control point is: keep K consistent (same lubricant, same coverage, clean threads, consistent nut bearing condition), then apply a controlled sequence and verification pass to reduce elastic interaction and embedment losses. Nut factor explanation
Step 4: Bolting Sequence & Controlled Tightening
Hand Tightening and Seating
Hand-tightening is your last “geometry check.”
Insert all studs and bring nuts to a consistent snug condition by hand in a cross pattern until nuts contact the flange. If anything binds, stop—this is where misalignment and thread problems show up early. The goal is even initial gasket contact, not gasket compression.
Star Pattern Tightening (ASME PCC-1)
Cross-pattern tightening reduces localized overload and helps equalize gasket stress.
PCC-1 includes legacy cross-pattern concepts and emphasizes controlled, multi-pass tightening to reduce scatter and elastic interaction. ASME PCC-1 official standard page
| Number of Bolts | Bolt Tightening Sequence (Cross-Pattern) |
|---|---|
| 4 | 1, 3, 2, 4 |
| 8 | 1, 5, 3, 7, 2, 6, 4, 8 |
| 12 | 1, 7, 4, 10, 2, 8, 5, 11, 3, 9, 6, 12 |
This is not about “pattern worship.” It is about controlling how gasket stress builds up so you do not trap a low-load quadrant or crush a high-load quadrant.
Multi-Pass Torqueing Procedure
Multi-pass tightening is the practical fix for bolt-to-bolt interaction and embedment.
One reliable workflow is:
- Pass 1: 30% of target torque in a cross pattern.
- Pass 2: 60% of target torque in the same pattern.
- Pass 3: 100% of target torque in the same pattern.
- Pass 4 (Check Pass): circular pass at final torque until no additional nut movement is observed.
Elastic interaction is real: tightening one bolt can unload adjacent bolts. A check pass is a simple field control to reduce the risk of “last bolt wins” behavior. BoltScience discussion (tightening sequence and interaction)
Final Check and Elastic Interaction
The final check is verification, not ceremony.
If you perform a final circular pass and still see notable nut movement, your earlier passes did not equalize load sufficiently (or friction scatter is too high). For critical services, consider upgrading the method (calibrated tensioning, calibrated turn-of-nut, or tension measurement approach per site practice). ASME PCC-1 emphasizes controlled assembly and qualification concepts because “torque alone” is frequently not enough for repeatable outcomes. ASME overview of PCC-1 intent
Note: Preload is the clamp force that must remain above sealing minimum after embedment and relaxation. If your joint leaks after the first thermal cycle, suspect loss of gasket stress (not “bad gasket” by default).
Disciplined flange assembly makes zero-leakage achievable.
When leaks occur, the fastest troubleshooting approach is to map the problem to these four controls: face condition, alignment, friction consistency, and load uniformity. Key takeaways include:
- Torque is a means, not a result: you are targeting bolt load uniformity and gasket stress control (supported by documented procedure and verification).
- Meticulous surface inspection prevents “invisible spacers” (films/residue) and cross-groove leak paths.
- Alignment control avoids stored energy and uneven gasket stress that shows up after cycling.
| Benefit | Description |
|---|---|
| Consistent performance | Reduced variability in bolt load and gasket stress across repeated maintenance cycles. |
| Risk reduction | Lower probability of leaks, unplanned rework, and fugitive emissions events driven by assembly scatter. |
| Operational Efficiency | Fewer retorques, fewer reassemblies, faster start-up stabilization after maintenance. |
A printable bolting checklist improves site compliance and makes post-job reviews possible. If your site tracks leak events, you can often correlate repeat offenders to one missing control step (usually alignment forcing or lubrication inconsistency).
FAQ: Flange Joint Integrity
What causes most flange leaks?
Most flange leaks are caused by low or uneven bolt load created by uncontrolled installation variables.
- Field data commonly shows insufficient gasket compression/low bolt load as a dominant contributor to leakage events. Example industry breakdown
- The repeat offenders are: residue on faces, misalignment forcing, friction scatter from inconsistent lubrication, and skipping verification passes.
How does ASME PCC-1 support joint integrity?
ASME PCC-1 provides a structured approach for assembling pressure-boundary bolted flange joints with process control.
- It frames assembly as a controlled procedure (cleaning/inspection, alignment, tightening method, verification concepts) rather than “tighten until it feels right.” ASME overview of PCC-1
- It supports training/qualification concepts and repeatable work practices that reduce leakage driven by human variability.
Why is the star pattern tightening sequence important?
Cross-pattern tightening helps distribute gasket stress more evenly and reduces the chance of trapping a low-load quadrant.
- It reduces localized gasket crush and localized under-compression, which are both leakage risks.
- It works best when paired with multi-pass tightening and a final check pass to account for elastic interaction. Bolt interaction and sequencing
What is the “Free Run” test for bolts and nuts?
The “Free Run” test checks whether a nut can travel the stud threads by hand without binding.
- If it binds, friction becomes unpredictable—torque no longer correlates to bolt tension in a repeatable way.
- Reject and replace the fastener pair (stud and nut) rather than “saving it” with extra torque.
Which factors affect bolt preload consistency?
Friction scatter (lubrication + surface condition) and interaction effects during tightening are the top drivers of preload inconsistency.
| Factor | Impact on Preload |
|---|---|
| Lubrication (K-Factor) | Changes friction; the same torque can produce very different bolt tension if K varies. T=KDF concept |
| Torque Method | Tool control and method consistency reduce scatter; multi-pass + verification pass mitigates interaction losses. |
| Bolt Condition | Corrosion/galling/damage increases friction scatter and can cause false torque readings (low actual tension). |

